[2024] How to Record Google Meet Meetings?
Google Meet is one of the premier workplace and educational video conferencing tools thanks to its robust feature set, accessibility, integrations, and ease of use. But mastering all of its built-in features can take some getting used to.
One important aspect of any meeting is noting what happened for everyone’s reference, and the best way to do that is by recording the entire meeting. But you may be wondering, how do you even do that? Today, we’re showing you exactly how to record a Google Meet session and breaking down all the important things to know before you get started.
Part 1: How to Record a Google Meet as a Host?
Once you’ve identified which plan your organization uses and confirmed you have access to Google Meet screen recording, all you have to do is start or join a scheduled meeting.
However, Google Meet screen recording is only available when joining a meeting via a computer. The feature is not available on the Google Meet mobile app. That said, here’s a step-by-step guide to record Google Meet on a laptop or PC:
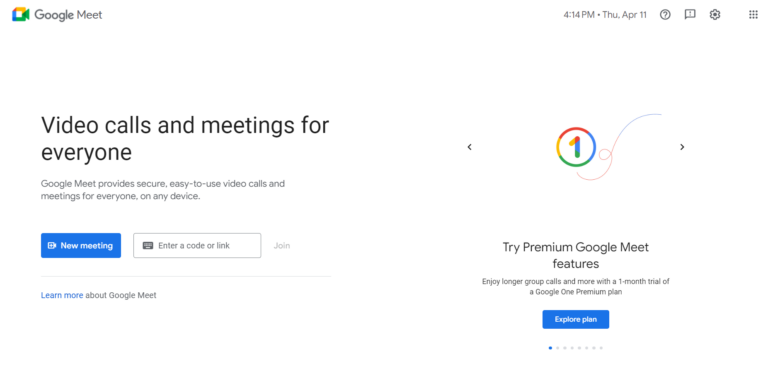
- Step 1.Go to Google Meetwith a compatible Google account signed in.

- Step 2.Start a new meeting or join a scheduled meeting.
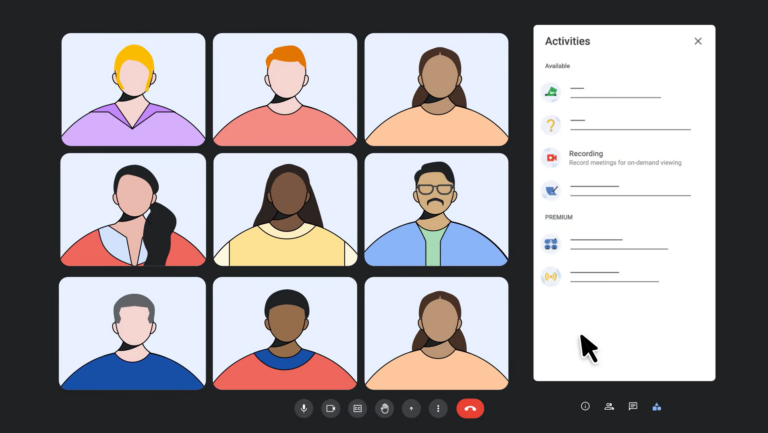
- Step 3.Once you’ve joined a meeting, select the ‘Activities’ icon in the bottom-right-hand corner of the meeting page.

- Step 4.In the Activities menu, select ‘Recording’.

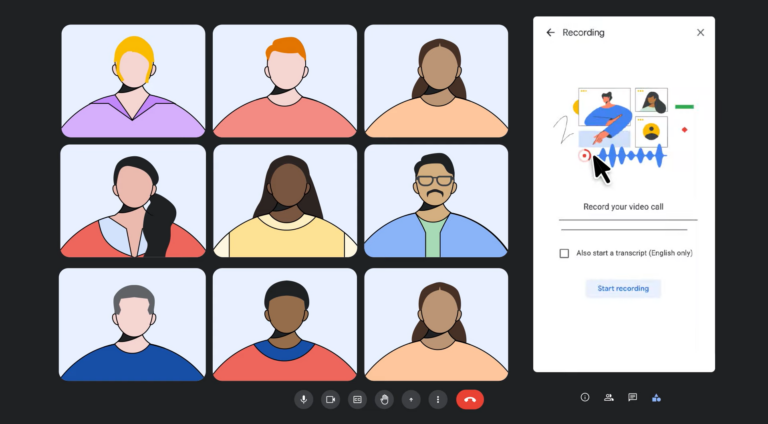
- Step 5.From here, you can start the recording and enable Google Meet to automatically include a transcript/captions in a supported language. Once you’re ready, click on the ‘Start recording’ button.

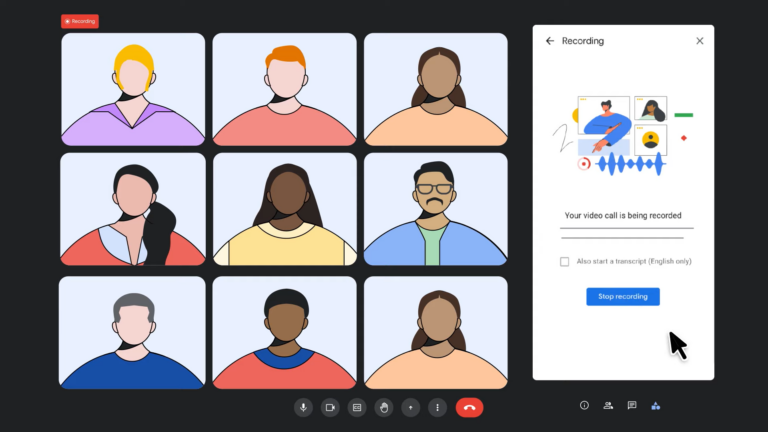
- Step 6.Once the recording starts, participants in the meeting will see a new ‘Recording’ pop-up in the top-left corner of the call page.

- Step 7.Once you’re done with the meeting/recording, go back to the ‘Activities’ panel > Recording > Stop recording to end the recording. Alternatively, the screen recording will end automatically when all participants leave the call.
- Step 1.Go to Google Meetwith a compatible Google account signed in.
Part 2: How to Record on Google Meet on Any Device Without Permission?
If you’ve gone through the above section and realized that your Google account does not have access or permission to use Google Meet screen recording, there are alternatives.
The good news is all major platforms including Windows, macOS, Android, and iOS have their own built-in screen recorders. We’ve outlined how to access the screen recorder on each platform:
How to Screen Record on Google Meet (PC)
Windows
On Windows, there are a few options to start screen recording with built-in features. One of these is the ‘Snipping Tool’, originally a screenshot tool that also added the ability to record your screen on Windows.
- Step 1.Open the Start menu on your Windows PC.
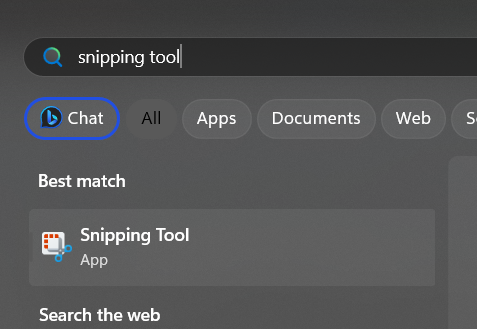
- Step 2.Type in ‘Snipping Tool’ in the search bar or select it from your app list.

- Step 3.In the Snipping Tool app, select the ‘Record’ option.

- Step 4.Click on the ‘+ New’ button to start recording your screen.
- Step 5.Before the recording starts, Snipping Tool will ask you to designate an ‘area’ where you’d like the app to record. We’d recommend selecting the whole screen to capture the entire meeting.
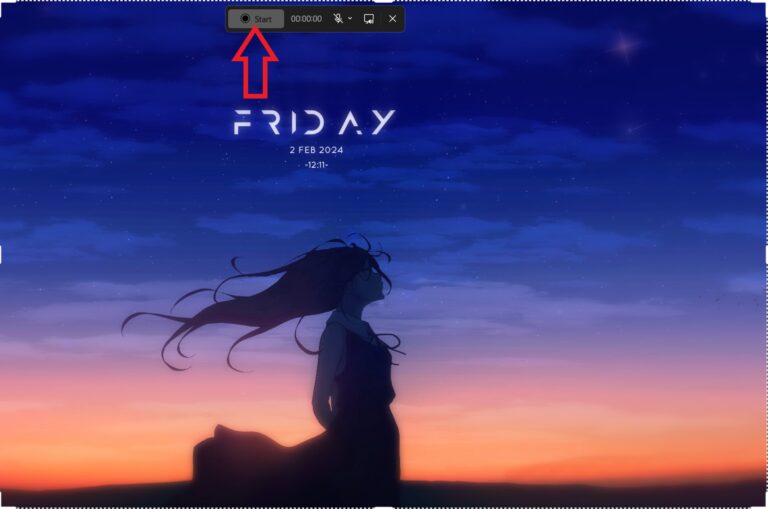
- Step 6.When you’ve joined the meeting, click on the ‘Start’ button in the Snipping Tool pop-up widget. Make sure to enable both mic and in-device audio recording so the app captures all audio during the meeting.

- Step 7.When the meeting is over, click on the ‘Stop Recording’ button on the pop-up widget.
- Step 8.When you’ve stopped the recording, it will redirect you to view/edit the recording in the Snipping Tool app. Here you can review the recording, edit it using the ‘Clipchamp’ app, or share the recording.

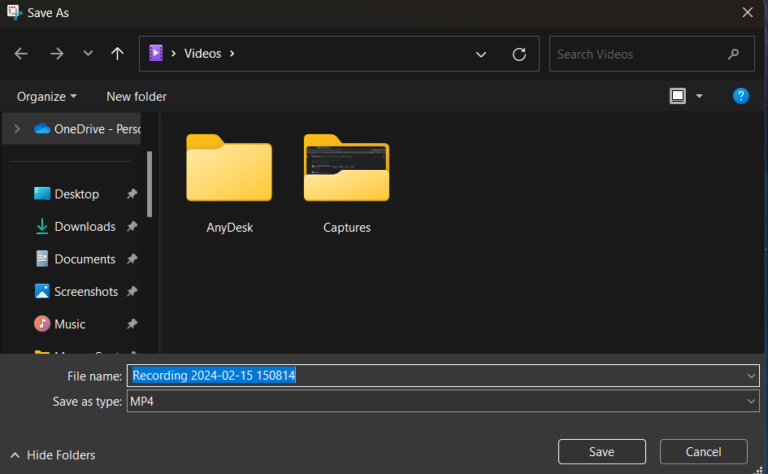
- Step 9.Click on the ‘Save’ icon to keep a copy of the recording. It will redirect you to your PC’s ‘Videos’ folder. You can change the location of the saved file here if necessary.

Mac
Similar to the Windows screen recorder, macOS laptops and desktops also have a few screen recording features built-in. For this method, we’re using the screenshot toolbar. However, this method is available only on macOS PCs using macOS Mojave or newer.
If your Mac is on an older macOS version, you need to use the QuickTime Player to record your screen.
That said, here’s how to record your screen on macOS Mojave or newer PCs:
- Step 1.On your Mac’s keyboard, press the ‘Shift + Command + 5’ keys. This will pull up the ‘Screenshot Toolbar’ widget.

- Step 2.In the center of the Screenshot Toolbar widget, you have two options to start screen recording.
- Step 3.Select the left-hand recording option to start a full-screen recording.

- Step 4.The right-hand side recording button designates a specific portion of your screen to record. We’d recommend using the full-screen recording function to record your Google Meet calls and editing the footage afterward.
- Step 5.Select one of the screen recording methods. Then click on the ‘Record’ button to start recording your screen and the Google Meet meeting.
How to Record Google Meet on Phone
Since Google Meet screen recording on is only available on a PC, if you’re joining from a mobile device, using these methods is your only option. Check out the method for the type of device you have to start screen recording:
On Android
Since the Android ecosystem and devices are so diverse, we’ve included a guide for one of the most popular Android brands, Samsung. However, most other brand devices will have the same feature though it may look/named differently depending on the manufacturer.
The method to access the screen recorder remains largely the same:
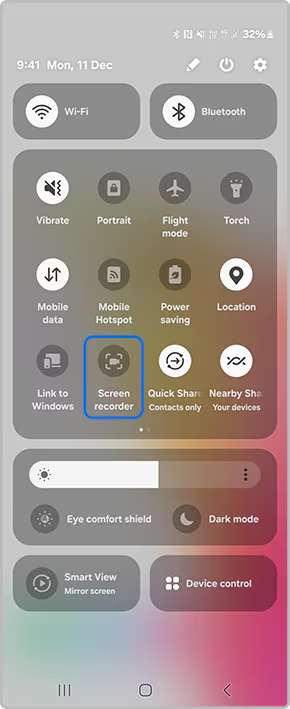
- Step 1.Swipe down from the top of the device display to access the Quick Panel.
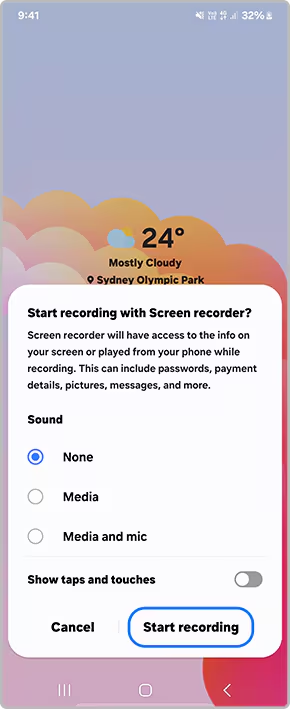
- Step 2.Select the ‘Screen Recorder’ option. If the option is missing, swipe through your device’s Quick Panel or edit the Quick Panel and add ‘Screen Recorder’.

- Step 3.Select the screen recorder audio settings. We’d recommend both media and mic recording.

- Step 4.Press ‘Start recording’ when you’re ready.
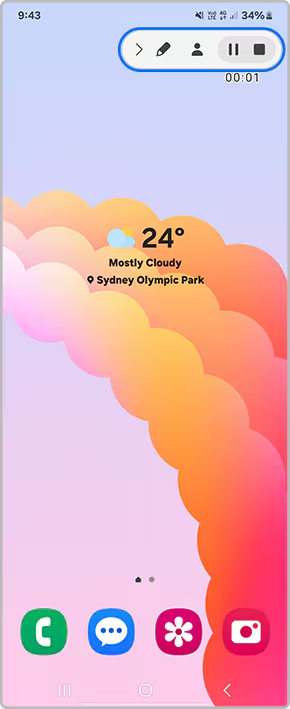
- Step 5.You’ll see the screen recording widget pop up on the screen. Tap on the ‘Stop’ button to end the screen recording.

On iOS
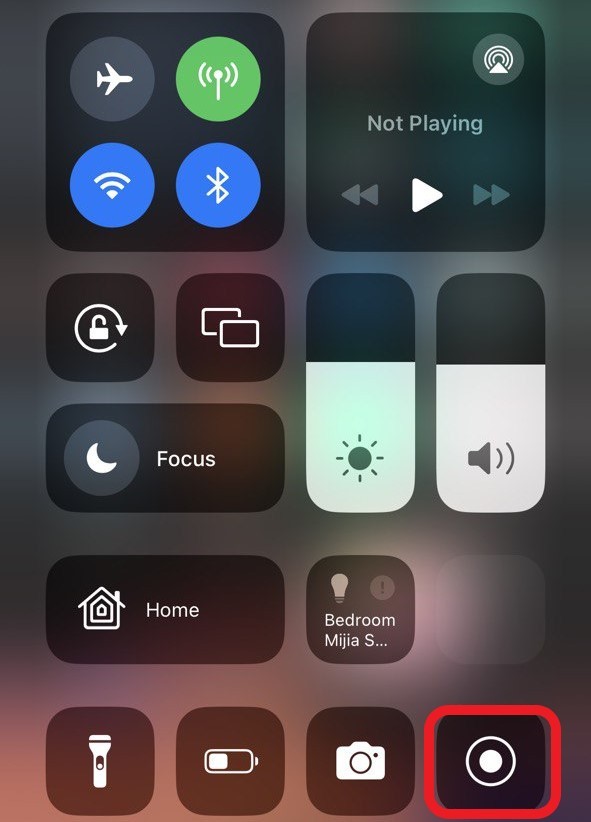
The screen recorder function on iOS devices is universal so all iPhones/iPads will follow the same layout. However, you may need to add the screen recorder function to your Control Center first before you can access it:
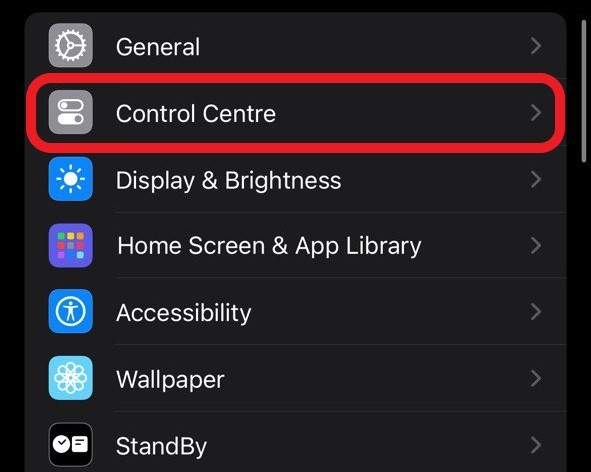
- Step 1.Open Settings and select ‘Control Center’.

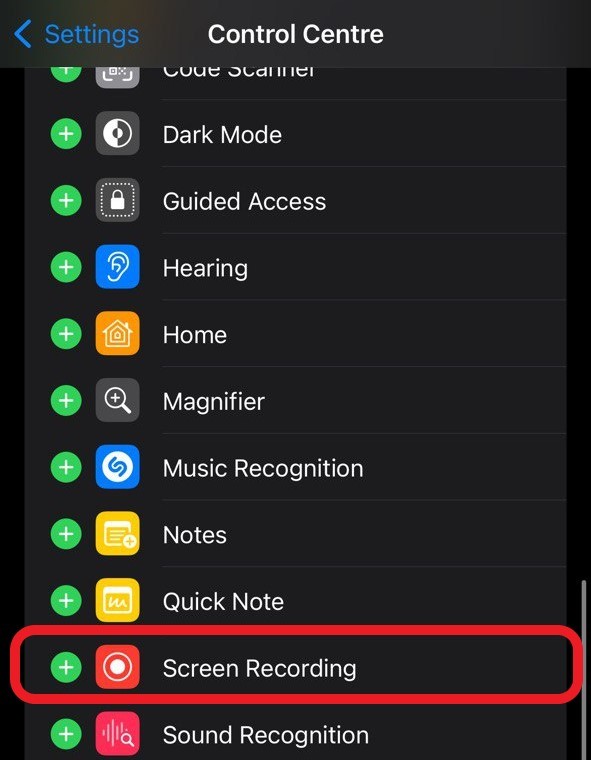
- Step 2.Scroll through the list and add the ‘Screen Recording’ option to your device’s ‘Included Controls’.

- Step 3.Swipe down from the top-right corner of your iPhone/iPad to open the Control Center.
- Step 4.Tap on the ‘Screen Recording’ tile to start recording your device’s screen.

Part 3: FAQs about Google Meet Recording
Part 4: Conclusion
And that’s how to record Google Meet meetings using both the built-in Google Meet feature and alternatives! For the best meeting recording, we’d recommend the Google Meet feature as the alternatives aren’t as focused on getting the best ‘meeting’ experience.
But if you just need a simple copy of any Google Meet calls or meetings and don’t want to shell out for a pricey paid subscription, built-in device screen recorders will work just fine.







Leave a Reply.