7 Methods to Exit Windows 10 Kiosk Mode of Different Configurations
Kiosk mode on Windows is implemented to attain a highly secure, purpose-built device for focused working.
There are multiple ways to configure Windows 10 kiosk mode, and each method has its own features and support, so users can choose the method based on their specific business needs. Similarly, the exit strategies for each method are different.
Let's discuss how to exit kiosk mode Windows 10 to run a restriction-free device with access to all device features.
1 Sign out of assigned access
Users need to exit assigned access to access all the device functions freely, and there are multiple ways to exit assigned access:
Method 1. Shortcut Key
Press Ctrl+ Alt+ Delete keys collectively. Sign out of your current account and log in with another account. It lets you exit the assigned access mode from the device.


Method 2. Task Manager
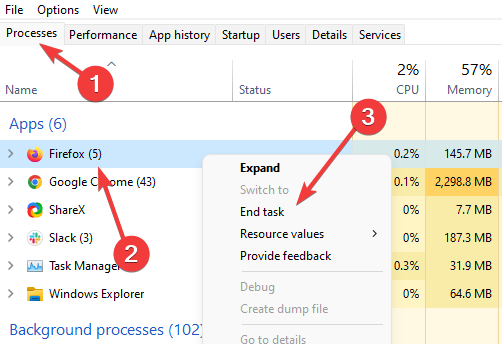
Use the shortcut key Ctrl + Shift + Esc to open the task manager. Once it is opened, choose the kiosk app from the list of opened tabs and applications. After selecting it, click the 'End Task' button, and the kiosk mode will exit as the app closes.

Method 3. Command Prompt
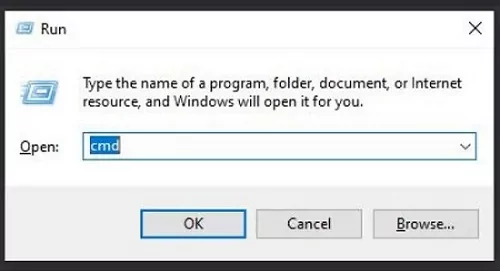
- Step 1. Open the Command Prompt by typing cmd in the Run program
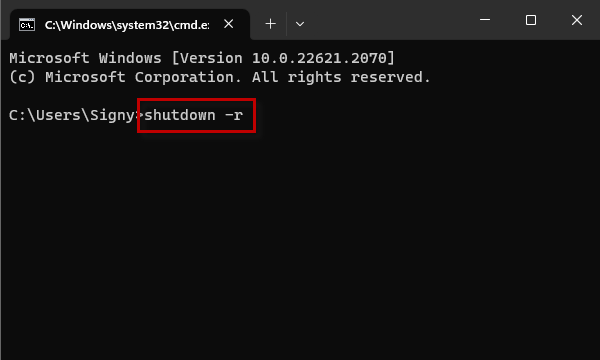
- Step 2. Type shutdown/r, and it will initiate the device restart process. You can also type shutdown/l to log off. It will exit the specific account that was logged in.
Method 4. Sign out from "Settings"
Follow these steps to learn how to exit kiosk mode in Windows 10 which set up with assigned access from Settings:
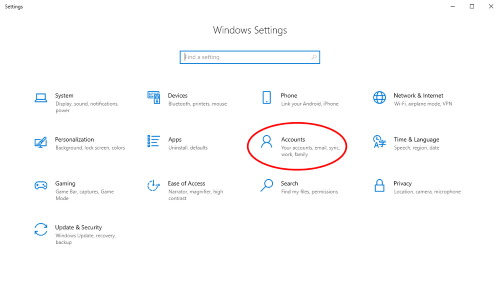
- Step 1. Press the shortcut key Windows key + I to open the Settings app on your Windows PC.

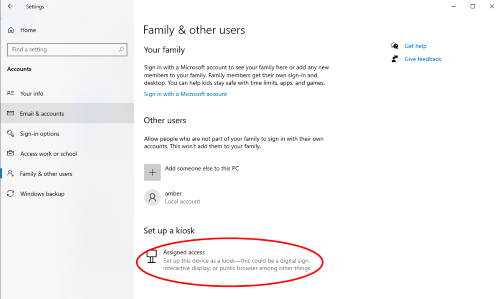
- Step 2. Select the 'Accounts' tab and click 'Family and other people.' Select the 'Set up assigned access' below the 'Other people' tab.
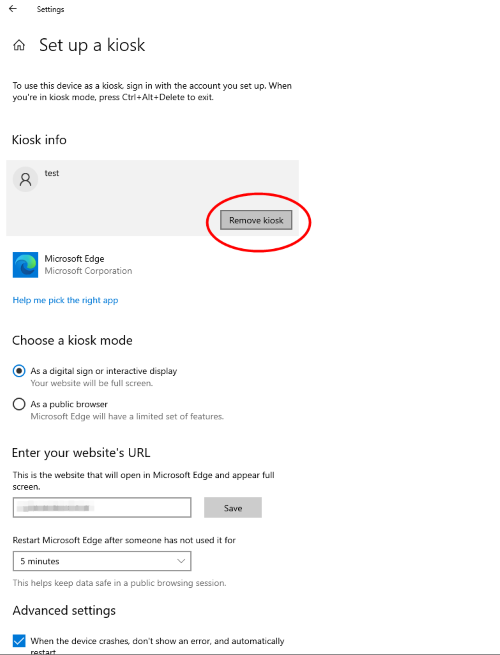
- Step 3. Select the current kiosk account and choose 'Remove Kiosk.' It will take the device from assigned access and run as a standard account.
Method 5. Turn off Assigned Access via Group Policy
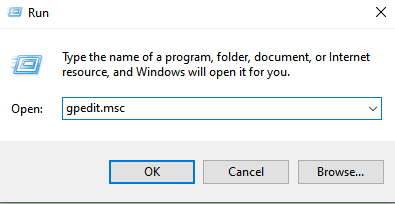
- Step 1. Open the run program from the Windows menu or press the Windows + R keys.
- Step 2. Type 'gpedit.msc' and press the enter key. It will take you to the group policy editor.
- Step 3. Move to the assigned access policy > navigate to the Computer Configurations tab > Select Administrative Templates > System > Assigned Access.
- Step 4. Now restrict assigned access by double-clicking the 'turn off Assigned Access'(or a similarly named setting) option.
- Step 6. After disabling it, click the 'Apply' button and then 'OK' to save changes. Restart the computer, and it will turn on automatically in normal mode.
Method 6. PowerShell
To disable the Windows 10 kiosk mode that was set up using PowerShell, you will use the Clear-AssignedAccess command in the PowerShell, and it will remove all the configured settings associated with assigned access and restore the device to its default settings.
Open PowerShell as an Administratoron your Windows 10. Use 'Get-AssignedAccess' to check if any account is configured with Assigned Access.
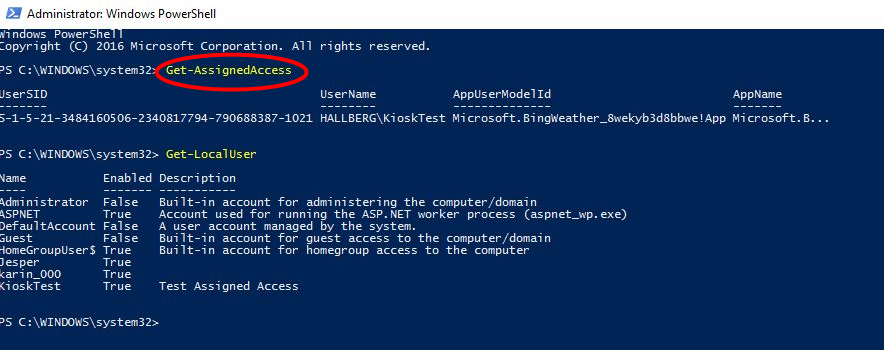
If an account is configured with assigned access, you can clear it by using this command:Clear-AssignedAccess
2 Remove Windows Kiosk Provisioning Package
A provisioning package contains specific configuration settings that are enforced on devices where it is enabled. IT administrators use it to configure employee devices without physically touching them. It provides a streamlined process for managing device settings when enrolled in the business network.
Follow the below guidelines to remove the kiosk mode by disabling the provisioning package from Windows 10:
- Step 1. Open device settings and select the 'Access work or School' tab. It is on the left-side menu.
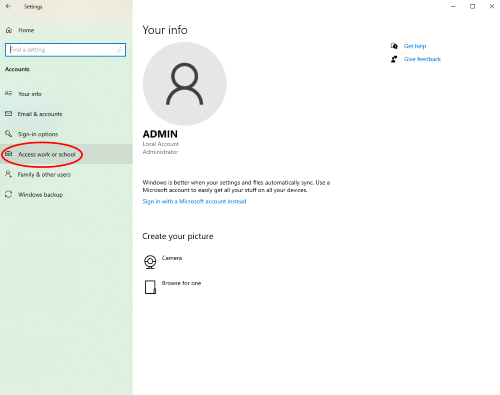
- Step 2. Now observe the right-side menu and select the 'Add or remove provisioning package' option.
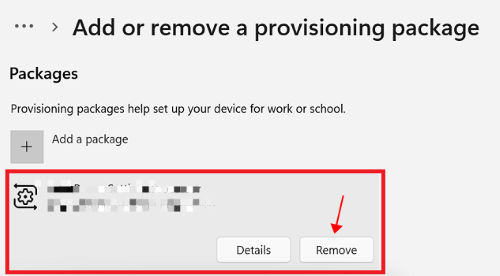
- Step 3. A list of provisioning packages will appear. Choose the one with set kiosk mode and press the 'Remove' button. The installed provisioning package will be removed from the device, and kiosk mode will ultimately exit.
3 Exit Kiosk Mode in MDM(Mobile Device Management)
The scenario for exiting kiosk mode through MDM solutions is different. MDM is the safest and most effective way to implement kiosk mode because end-users cannot exit it without admin permission.
Different MDM solutions have different steps to exit kiosk mode, but the basic principle is almost the same: They require admin permission to enter the MDM dashboard and exit it.
Demo - How to Exit Windows 10 Kiosk Mode of AirDroid Business
- Step 1: Sign in to the AirDroid Business admin console.
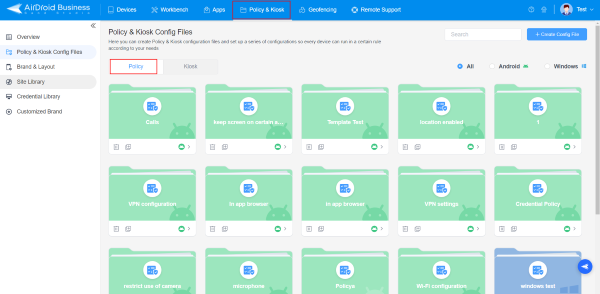
- Step 2: After successful login, navigate to the 'Policy & Kiosk' tab and click on it to open the menu. Find the 'Policy' option.
- Step 3: Find and choose the profile that has set your Windows device into kiosk mode. Edit or delete the profile to exit kiosk mode.
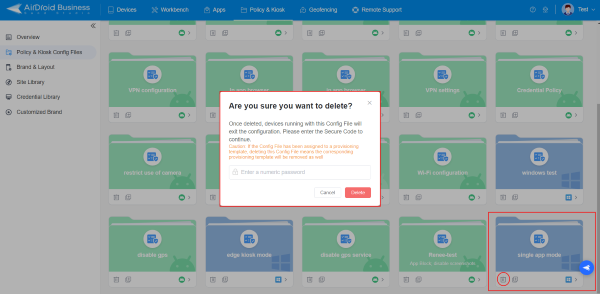
- Step 4: It is important to sync your Windows device into AirDroid Business so the current changes are applied to it. Usually, the devices are automatically synced, but if not, you need to do it to apply changes manually. Restart the device to exit it from kiosk mode and run as a standard Windows device.


Leave a Reply.